Tuesday, August 7, 2018

Tips on How Fix Some of the Most Common Smartphone Problems

As more and more people rely upon their smartphones for more than just their phone, it seems like the number of problems and issues we experience are on the rise. Fortunately, many of the smartphone common problems we experience can be resolved on your own without having to take your phone to a repair technician.

Fix Smartphone Problems

  • Cracked Screens: The easiest way to prevent a cracked screen is to get a screen protector. If your screen is already cracked, you can replace the screen yourself. Just remember to check out videos on YouTube first to make sure it is something you can do.

Thursday, March 22, 2012

Western Digital Puts 2TB of Storage in Palm of Your Hand for $250

Who needs the cloud when you can have two terabytes of storage in the palm of your hand?
That's what Western Digital offers with its latest line of Passport portable drives announced Tuesday. The new drives are offered in four capacities--500GB ($129.99), 750GB ($149.99), 1TB ($199.99) and 2TB ($249.99)--and five colors--white, black, silver, blue, and red.

Along with massive storage, the new drives include software for backups and security. The WD SmartWare software can be configured for backups that are automatic and continuous­--when you change a file, it's immediately altered in the backup on the drive. WD Security can password-protect the drive and encrypt the data on it.

Western Digital also says that it has improved the casing for the portable drive line, which makes it more resistant to scratches and fingerprints.

To achieve 2TB, Western Digital uses four 2.5-inch platters, which pack in 500GB of data per platter, in a 15mm z-height drive. That means you won't be seeing this drive in a laptop anytime soon; laptops typically have accommodation for a 9.5mm z-height hard drive. The company's current 1TB drive uses only three platters.

The 2TB drive measures 4.4 by 3.2 inches, and support USB 3.0.

Western Digital is one of the largest producers of hard drives in the world. It recently purchased the assets of Hitachi Global Storage Technologies after agreeing with the U.S. Federal Trade Commission (FTC) to sell off some of its hard drive assets to Toshiba to address anti-competitive concerns of the agency. Without the agreement, the Hitachi purchase would have made Western Digital one two companies controlling the worldwide market for desktop hard drives.

Source 'http://www.pcworld.com/article/252226/western_digital_puts_2tb_of_storage_in_palm_of_your_hand_for_250.html'

www.timdatarecovery.com
info@takingitmobile.com
1-888-CALL-TIM

Wednesday, February 29, 2012

How to Share an External Drive Between a Mac and a PC

Looking to share an external hard drive between a Mac and PC? The best way to do it is with a drive formatted as FAT32. Though this format has some limitations, it enjoys nearly universal support from active platforms, including Mac and Windows operating systems, and many gaming and Linux OSs.
The chief drawbacks of FAT32 involve file and partition size limitations. FAT32 imposes a size limit of 4GB on single files. So if you work with bulky video clips, for example, adopting FAT32 may not be a good idea. When formatting partitions, Windows 7's Disk Management utility won't let you create one that's larger than 32GB, whereas Mac OS X Lion can create partitions as large as 2TB using its Disk Utility application. Finally, Mac OS X's Time Machine backup utility won't work with FAT32.

Windows prefers to use NTFS (which stands for New Technology File System, though it has been around for nearly 20 years now). Macs running Snow Leopard or Lion can read from drives formatted as NTFS, but they can't write to such drives unless you install a third-party driver or muck about in the Terminal. Conversely, Windows 7 can't read and write to drives formatted as HFS+--also known as Mac OS Extended (journaled)--unless you install third-party software such as Paragon's.

Formatting From a Mac


To format a drive as FAT32 from a Mac, follow these simple steps.

1. Set up your drive following the manufacturer's instructions. Connect the power supply (if necessary), connect to the Mac via USB or FireWire, and turn on the drive. The drive should automatically mount on your Mac's desktop (if the finder preferences are set to show external drives). If the drive is not formatted, you may get a message saying that the drive is unreadable by Mac OS X and asking you whether you want to format it via Disk Utility. We're going to do this anyway, so open Disk Utility from the prompt or by navigating to /Applications/Utilities.

Select MS-DOS (FAT) as the format.Select MS-DOS (FAT) as the format.

2. Mac OS X won't let you create a FAT32 partition larger than 2TB; so if your drive is larger than that, you'll need to divide the available drive capacity into multiple partitions. You can format the remaining space as a second FAT32 partition or as an HFS+ partition, or you can leave it as unallocated space. To create a new partition, click the drive in the list on the left side of the Disk Utility menu. Click the Partition button in Disk Utility's main window. By default, Mac OS X will use the GUID partition table to format the drive. You can use this and still share FAT32 volumes with a PC, but if you'll primarily be using the drive with Windows, and if the full capacity of the drive doesn't exceed 2TB, the wiser course is to wipe the drive and then use Windows' Master Boot Record (MBR) partition scheme.
Establishing the partition layout.Establishing the partition layout.
3. Click the Partition Layout drop-down menu in Disk Utility, and select the number of partitions you want to create. By default, Disk Utility will divide the available space in half. You can resize the partitions by clicking the line between the partitions and dragging it up or down to increase or decrease the capacity of one or the other side.

4. Click on whichever partition segment you want to format as FAT32. Type a name for that partition in the Name field and choose the FAT32 option from the Format drop-down menu. Once everything is arranged as you want it, click apply. A progress bar will appear at the bottom right of the window as Disk Utility creates the requested partitions. Once it finishes creating them, you can move the drive between Macs and Windows PCs, and move files back and forth easily.

Formatting From a PC


FAT32 conversion; click for full-size image. Select your hard drive, and choose 'Convert to MBR Disk'.Here's how to create a FAT32 partition from a Windows 7 PC.

1. Open the Disk Management utility. To do so, select Start, Control Panel, System and Security, Create and format hard disk partitions. Alternatively, press the Start button and start typing partitions.

2. Find the drive you'd like to format; in my case, it was Disk 5. Click the disk number, and select Convert to MBR Disk ("MBR" stands for "Master Boot Record"). Right-click the unallocated segment in the next field over, select New Simple Volume, and click Next when the wizard launches. Change the value in the Simple Volume size field to 32,768MB or less--it needs to be under 32GB, to satisfy the format's file limit. Assign a drive letter, and click Next.

Formatting the partition.Formatting the partition.

3. Choose the drive letter to be assigned and click Next. Select FAT32 from the File System drop down menu, label the volume however you like, check the box next to Perform a quick format, and click Next. The resulting window tells you that you have successfully completed creating the volume. Click Finish and you're ready to go.

Source 'http://www.pcworld.com/article/250431/how_to_share_an_external_drive_between_a_mac_and_a_pc.html'

www.timdatarecovery.com
info@takingitmobile.com
1-888-CALL-TIM

Monday, February 13, 2012

Google Updates YouTube with Discovery Features

Google is updating the YouTube app for Google TV owners this week, promising performance improvements and easier ways to discover videos you like.

Google quietly announced the refresh on Sunday. The revamped app will be available as an update in the Android Market.

The new YouTube app for Google TV now features channel pages, and you can see related videos and more videos by the same user when you press up or down on your remote. A feature called Discover also allows you to browse through YouTube channels by categories.


“First you’ll notice the app works faster with smoother navigation for a better experience,” says Google TV product manager Jurek Foryciarz in Google's statement. “Whether you’re looking for hilarious comedy, delectable cooking content, or the latest news, you can find great channels for any of your interests.”

With the improved integration of channels on YouTube for Google TV, the company continues its push for original channels that began last year. In a bid to attract more viewers and compete with streaming services such as Hulu and Netflix, these new channels are intended to complement the amateur videos and the non-exclusive, professional movies and TV shows on YouTube.

Updated Apple TV Looms


Google is not the only one pushing updates for its set-top box software. Apple is expected to make a further foray in living rooms with an updated Apple TV set-top box, too. Last updated in 2010, the Apple TV appears to be running out of stock at all major retailers, which according to a 9To5Mac report, indicates an updated version is looming.

Beside an updated Apple set-top box, several reports in the past few months suggest the company is also working on a full-fledged television set. First hints are found in Walter Isaacson's authorized biography of Steve Jobs, in which Isaacson quotes Jobs as saying of his quest for integration: "I finally cracked it." The set purportedly features Siri-style voice input and would ship as early as 2013.

Source 'http://www.pcworld.com/article/249850/google_updates_youtube_with_discovery_features.html'

www.timdatarecovery.com
info@takingitmobile.com
1-888-CALL-TIM

Friday, February 10, 2012

Google's GDrive Reportedly To Launch As Dropbox-rival 'Drive'

Google's long-rumored GDrive that would let you upload and store files to its servers and be able to access them from anywhere you have an Internet connection may finally be close to launching in the coming weeks as a more cheaply priced Dropbox rival.

The new product, reportedly called "Drive," will be free to consumers up to a certain size limit, and would also be folded into Google Apps for enterprise customers, according to The Wall Street Journal. The newspaper cited "people familiar with the matter."

"If a person wants to email a video shot from a smartphone, for instance, he can upload it to the Web through the Drive mobile app and email people a link to the video rather than a bulky file," the newspaper said.

If that scenario sounds familiar, that's because Google already offers similar functionality using a variety of Google tools.

You can, for instance, record a video on your Android phone and then have it uploaded automatically to Picasa through a service called Instant Upload. Then you could either share your video on Google+ or move it to a different album to share publicly or with a select group of people such as close family members.

Google also allows you to upload files of any type to Google Docs, effectively giving you a Dropbox-like service. When Google added the functionality in early 2010, many critics referred to it as a kinda, sorta GDrive.

By the end of 2010, Google had also added drag-and-drop functionality to Google Docs (just as it had to Gmail in April and May that same year), making the service even more GDrive- or Dropbox-like.

Unlike Dropbox, however, which offers 2GB free storage, Google Docs' storage offerings are a bit more complex. You can upload up to 1GB to Google Docs, while files created inside Google Docs have specific limitations such as 400,000 cells for spreadsheets with a maximum 256 columns per sheet.

Google in 2011 also unveiled an online music locker and streaming service called Google Music.

So if Google is already offering online storage for virtually anything you have stored on your PC, what could this rumored "Drive" offer that is new? Will Google simply duplicate offerings it's already built? Possibly, but given CEO Larry Page's recent focus on integrating Google's services, that seems unlikely.

Google may be looking to bring its cloud storage services for photos, videos and files into one cohesive whole. That way you'd have one central drop location for your files similar to Dropbox or Microsoft's Web-based alternative, SkyDrive, instead of having them spread across multiple services.

It's not clear if Google's long-awaited GDrive would also offer you easy access to your documents already on Google Docs. But that seems likely if Google's vaunted "Drive" is a web-based tool as most of the company's other popular products are.

Another option is to emulate Dropbox's desktop-web hybrid model that sticks a folder on your desktop. Anything you put into the folder is then automatically uploaded and synced to Dropbox's servers and your other Dropbox installations.

Google's expected GDrive was first rumored around 2007, then resurfaced in 2009 after a reference to "Google Web Drive" was discovered in a collection of Google desktop programs. In September 2011, TechCrunch reported that Google Drive was launching "for real this time."

Source 'http://www.pcworld.com/article/249605/googles_gdrive_reportedly_to_launch_as_dropboxrival_drive.html'

www.timdatarecovery.com
info@takingitmobile.com
1-888-CALL-TIM

Monday, February 6, 2012

How to Make Your Windows PC Boot Faster

Back in the old days of 2010, I used to walk into my home office in the morning, hit the power button on my production system, and then head back upstairs to have breakfast. By the time I returned to the office, my system had fully booted up and was ready to go.

Then I upgraded to a solid-state drive RAID array--and now my system boots in about 30 seconds. However, not everyone is willing to spend $700 on PC's storage, so I decided to find out how much I could speed up a PC's boot time without spending a dime. After several hours of tweaking and testing, I managed to reduce the boot time of a PC from 69 seconds to 47 seconds. Here's how I did it.

The Test System


Rather than artificially creating a slow-booting system by installing a bunch of glop from the Web, I decided to use an existing system--one that I use almost daily. It's not my speedy, SSD-equipped production system, but my system for performance-testing add-in graphics cards. Since that system also serves as a backup content editing system, I've installed Adobe Master Collection 5.0 on it, along with all of the extraneous stuff Adobe likes to add to a system. Microsoft Office is another major software component.

Among its hardware components are a Core i7 965X quad-core CPU, 6GB of RAM, and a 7200-rpm Seagate 7200.11 1TB hard drive.

This setup allowed me to test real-world improvements in boot times on a system that reflected real-world usage. Over the years, I have installed numerous graphics cards on it, which also means numerous driver installs and uninstalls. Games and applications have come and gone, too. What you won't see from optimizing a gradually cluttered real-world system are insanely big improvements, as you might with some of the artificial tests that are floating around.

The PC Boot Process


window fixesIllustration by The Heads of StateWhen you fire up your PC, the processor performs some initial startup steps and then looks for a specific memory address in the boot loader ROM. Next, the processor starts to run code that it finds at this location, which is the system boot loader. The boot ROM enumerates all of the hardware in the system and performs a number of diagnostic tests. Then it looks for a specific location on the first storage device--probably your hard drive, assuming that the system isn't set up to boot from a network--and runs code found in that location. That's the start of the operating system load process.

For Windows, the code that your processor loads is the Windows Boot Manager. The boot manager then begins the process of loading Windows. At some point during this process, the core of the Windows operating system--the kernel--loads into memory along with some key drivers and the hardware abstraction layer. The HAL functions as the interface between the operating system and the underlying hardware. After this, the Windows Executive, a collection of essential services such as the virtual memory manager and the I/O manager, fires up and loads the Windows Registry.

The Registry contains information about what services, drivers, and applications load during boot. The Registry is actually a database that stores configuration settings, options, and key locations for both high-level applications and low-level OS services. Over time, as users install and uninstall apps, the size of the Registry can balloon, thereby increasing load times. Boot times are also affected by the loading of key services and startup applications.

This summary is by no means a detailed description of the PC boot process. Consult a detailed tutorial on the Windows boot process--such as this one--if you want to dive deeper.

In view of the PC boot process, we can explore several areas to reduce boot times:

  • The System BIOS or Extensible Firmware Interface (EFI)
  • The Windows Boot Manager
  • System Services
  • Application Services (helpers)
  • Startup Programs
  • Windows Registry

Let's consider each of these Windows functions individually.

Disabling Extraneous Services


Before proceeding further, I needed to measure my system's pretweak boot time. One way to do this is to create a text file containing the text "Stop the Stopwatch." Drop this into the Windows startup applications folder in C:\Users\your username\AppData\Roaming\Microsoft\Windows\Start Menu\Programs\Startup. This allows you to time the boot process with a stopwatch and know when to stop the watch. The boot process isn't completely finished at this point, but the system will be in a usable state.

Measured by this method, my system took 69 seconds to boot--far too long. It was time to nuke some services.

First, I looked at the startup services that opened when my system booted. You can check the list for your PC by running msconfig, a built-in Windows utility. Click the Start menu, type Run, press Enter, and then type msconfig in the Run box. Click the Services tab. In the accompanying screenshot you can see that, for simplicity's sake, I ticked the checkbox next to 'Hide all Microsoft services'; nevertheless, I did plan all along to disable a few Windows services.

Services that open at startup on a typical working system; click for full-size image.List of services that open at startup on a typical working system, as identified by msconfig.

In addition to disabling all of the services shown in the above list, I disabled six Microsoft Windows services from starting on boot:

  • Windows Media Center receiver
  • Windows Media Center Scheduler service
  • Microsoft Office Groove Audit Service
  • Microsoft Office Diagnostic Service
  • Smart Card Removal Policy
  • Smart Card

Since I don't use Windows Media Center on this system, disabling the first item on the list was an easy decision. And these changes only scratch the surface. Another item that you might disable on startup is Remote Login (if you never use it). The right choices depend on your needs.

After disabling the extraneous application services and a handful of Microsoft services, I found that the system now took 68 seconds to boot--not much of an improvement. The next step was to disable a few startup applications.

Disabling Startup Applications


Msconfig's Startup tab lists applications that start on bootup. Here is the list on my test system.

List of startup applets and helpers; click for full-size image.Most of these startup applets and helpers aren't necessary.

Most of the listed startup applets are at least occasionally useful, but none are essential from the get-go. I can manually check for Adobe updates, let QuickTime and Acrobat start a tiny bit slower when I need them, and so on. So l just unchecked all of the applets on the Startup list.

System boot time: 57 seconds.

Now we're talking. Disabling startup applications and a few services trimmed 11 seconds off a 69-second boot time--an improvement of nearly 16 percent.

System BIOS Tweaks


The Asus P6T6 Deluxe motherboard on my test system has two ethernet connectors, but I need only one of them. The motherboard is also set up to check the optical drive to see whether it contains a bootable CD or DVD--and only after that, to try to boot off the hard drive. And finally, since I don't use my external and secondary SATA controller, I don't need a BIOS check for the Marvell discrete SATA controller. Armed with this knowledge, I entered my PC's BIOS during startup, and performed three quick operations: disabling the second ethernet port, setting up the system to boot from the hard drive first, and disabling the discrete SATA controller.

Boot time: 52 seconds

So on my system, disabling a few unused BIOS items netted a savings of 5 seconds at bootup. Not bad.

Cleaning the Registry


Does cleaning the Registry of unused or orphan database entries lead to faster boot times? A number of articles suggest that it does, but many of them base that conclusion on rather extreme testing--loading up a system with a lot of junk, and then using a Registry cleaner to remove the new additions. The PCWorld Labs has tested PC cleanup utilities in the past, and found that they slightly improve boot time (and minimally improve overall system performance, but that's another story). But how effective are they on system whose encrustation of junk occurred naturally?

I used Piriform's Ccleaner 3.12, a popular Registry and system cleaner to autoscan my system and identify items that it thought were useless.

Ccleaner; click for full-size image.Ccleaner scans and cleans out the system; but does doing so improve boot times?

I handled the cleanup in two steps--first having Ccleaner remove extraneous files, cookies, index files, log files, and other clutter, and then accepting Ccleaner's recommendations regarding unneeded Registry entries and cleaning those out. The first sweep with Ccleaner improved my test system's boot time by 1 second (to 51 seconds,) and the second sweep yielded another 1-second advance (to 50 seconds).

So Ccleaner's cleanup work was good for 2 seconds at bootup-- a modest upgrade. Still, cleaning extraneous garbage from your Registry and your system can have other positive effects, such as reducing the Registry's memory footprint and regaining disk space. Both of those can improve system responsiveness.

I now had one more corrective measure to try: setting the boot timeout delay.

Changing Boot Timeout


You might expect changing the boot timeout not to have much impact, since all it does is specify how long Windows may display an automatic menu, such as the Startup Repair menu. But it turns out that changing the boot timeout does affect boot performance.

Changing the boot timeout; click for full-size image.Change the boot timeout from 30 to 10 seconds

The default boot timeout setting on my test PC was 30 seconds; but 10 seconds should give users sufficient time to respond to any menus that Windows may present.

The boot time after I made this change: 47 seconds.

This was a repeatable test. It's unclear to me why this alteration has such a relatively large impact, but 3 seconds is 3 seconds.

Final Thoughts


You can dig deeper into each step of the process I've outlined here to reduce boot times further. But with a modest amount of effort, the boot time on my fairly typical system dropped from 69 seconds to 47 seconds, a reduction of more than 30 percent.

Another option, of course, is to throw money at the problem, depending on the system you're starting with. In my speedy production system, the 
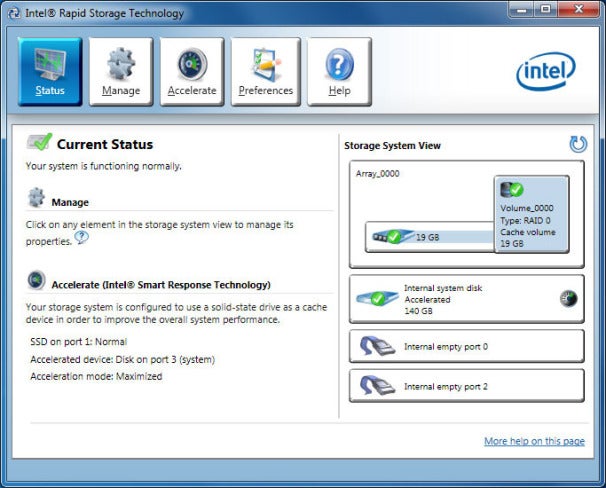
SSD RAID array boots the PC in less than 30 seconds--without the aid of any of the tweaks I've discussed here. Alternatively, if you have a Sandy Bridge PC running Intel's Z68 chipset, you can add a more modest (64GB or less) SSD drive and enable SSD caching of the drive. That can significantly improve boot times and reduce the load time that commonly used applications require.

But even ordinary systems can see substantial decreases in boot time. The key is to optimize each step of the boot process, one at a time. You don't need to do them all in one sitting, either. And be sure to recheck your system's boot time every couple of months, because installing new applications may make it get longer again.

Source 'http://www.pcworld.com/article/244020/how_to_make_your_windows_pc_boot_faster.html'

www.timdatarecovery.com
info@takingitmobile.com
1-888-CALL-TIM

Thursday, February 2, 2012

How to Set Up Intel Smart Response SSD Caching Technology

When Intel launched the Z68 Express Chipset for second generation Core family processors, one of the chipset’s differentiating features was support for Smart Response Technology, or SRT, a solid state caching technology designed to enhance overall system performance and responsiveness. Smart Response Technology is not a feature specific to the Z68 Express chipset hardware, however. The technology is actually implemented fully in Intel’s Rapid Storage Technology drivers and software (v10.5 or newer), but is only enabled on the Z68 Express or newer 6- and 7-Series Intel chipsets.

Intel’s Smart Response Technology is a transparent caching solution that intelligently monitors both reads and writes to and from a standard hard drive and caches the most frequency accessed bits of data to a faster solid state cache. By mirroring the most commonly accessed bits of data to the solid state cache, and using said cache for subsequent transfers, Intel’s SRT technology can essentially offer solid state drive-like performance in a system that uses a standard hard drive for its main storage volume. For those that are not well versed on solid state drives, they typically offer near instantaneous access times with transfer speeds that dwarf even the fastest of hard drives. A modern SATA III SSD, for example, can offer reads and writes in the 550MB/s range with sub-1ms access times, whereas a 10,000 RPM hard drive may hover in the 160MB/s range under ideal conditions with multi-millisecond access times.

Intel Smart Response Technology can be configured to consume up to 64GB of space on an SSD. Smaller SSDs will work fine though (we tested with a 20GB model), and the extra space on SSDs larger than 64GB can still be accessed by the system.Intel Smart Response Technology can be configured to consume up to 64GB of space on an SSD. Smaller SSDs will work fine though (we tested with a 20GB model), and the extra space on SSDs larger than 64GB can still be accessed by the system.

A hybrid HDD / SSD caching solution also offers some usability benefits. Due to the relatively high cost of solid state drives, it is common for PC users to pair a mid-sized SSD in the 60 – 120GB range to a larger hard drive. The smaller SSD is typically used for the operating system and frequently used applications and data, while the hard drive is used for bulk storage. A configuration like this offers excellent overall performance and storage capabilities, but requires the user to manage multiple drive letters and potentially move data manually from the SSD to the hard drive and back, if the SSD is running low on space. With a hybrid solution like Intel’s SRT, the SSD (or a portion of an SSD) is hidden from the OS and data is cached automatically. No additional drive letters are necessary and data is dynamically moved to and from the SSD based on individual usage patterns. The end result is a system that can offer SSD-like performance, with hard drive-like capacities, without the user having to manage multiple drive letters.

Hybrid solutions like Intel’s SRT also have some drawbacks, however. Like other SSD/HDD hybrid configurations, the data on the hard drive must be accessed multiple times before it is mirrored to the solid state storage volume for caching purposes. As a result, the SSD cache will offer little or no performance benefit to new or infrequently accessed data. With large file transfers, new application installations, file copies and the like, a system with Smart Response Technology enabled may perform as if it only had a lone, standard hard drive installed.

With that said, there are noticeable benefits to using SRT in the vast majority of circumstances. To do so, however, may require an OS reinstallation due to SRT’s requirements. For Intel’s Smart Response Technology to function, you must have a compatible chipset, the storage controller in the system must be configured for RAID mode and the proper Intel RST drivers must be installed (version 10.5 or later). If your system’s storage controller is configured in IDE or AHCI mode and Windows is already installed, switching to RAID mode may result in blue screens and a nonbootable system, without resorting to some driver and registry trickery.

Installing and enabling Intel’s SRT is ultimately, quite easy. Assuming a system with a single SSD and a single hard drive, connect both drives to the Intel-powered SATA ports in your system, then fire it up, an enter the system BIOS, and configure the SATA controller to RAID mode. Then restart the system and install Windows to the hard drive, ignoring the SSD for now. When the Windows installation is complete install the drivers necessary for you system’s components, including the Intel chipset drivers and Intel Rapid Storage Technology (SRT) drives—both can be downloaded at the Intel Download Center.

In a properly configured system, Intel’s Smart Response Technology can be enabled or disabled via the Intel Rapid Storage Technology control panel, which gets installed along with the storage controller’s drivers.In a properly configured system, Intel’s Smart Response Technology can be enabled or disabled via the Intel Rapid Storage Technology control panel, which gets installed along with the storage controller’s drivers.

Once those drivers are installed, the system will restart, and the Intel RST control panel will be accessible via an icon in the system tray. Double-click the Intel RST icon and a control panel GUI will open. Within that control panel--provided everything is installed properly--there will be an Accelerate button at the top. Click on the Accelerate menu button, then select the SSD and define how much storage space to use. Intel’s Smart Response Technology can use up to 64GB of space on an SSD for caching purposes. With an SSD of 64GB or smaller, you can use the entire drive and the system will appear to the OS as having only a single drive. With an SSD larger than 64GB, you can use as much of the drive for SRT as you prefer (obviously larger caches will yield better performance with larger amounts of data), and the unused space on the SSD can be partitioned and assigned a drive letter.

Once the SSD is selected and capacity is defined, you can enable acceleration and choose an SRT mode. There are two modes available: Enhanced or Maximized. Enhanced is essentially a write-through cache mode, where writes speeds are limited by the hard drive’s performance. Maximized mode acts as a write-back cache, however. A Write-back cache provides the highest overall performance, because writes are cached and written to the hard drive later.

So how much performance can you expect to gain by enabling Intel’s Smart Response Technology? We tested the technology with a Core i7-2600K powered system, with 4GB of RAM, a WD Raptor hard drive, and a 20GB Intel SSD, all running under Windows 7 Ultimate x64. With SRT disabled, the system put up a PCMark Vantage score of 12,138. With SRT acceleration enabled and operating in Enhanced mode, with the entire 20GB capacity of the SSD used, the system’s PCMark Vantage score jumped to 16,563. And with SRT operating in Maximized mode, performance in PCMark Vantage increased to 16,582—a boost of about 36 percent. What the numbers don’t convey is the speedier “feel” of the system. The low access times and quicker transfers afforded by the SSD result in a much snappier, responsive system over one with a hard drive alone. The difference is like night and day.

Source 'http://www.pcworld.com/article/248828/how_to_set_up_intel_smart_response_ssd_caching_technology.html'


www.timdatarecovery.com
info@takingitmobile.com
1-888-CALL-TIM